Starting April 12, 2021, we're allowing some customers who have users on our original user model to self serve and migrate those users to be on the New Relic One user model.
Background
On July 30, 2020, we released a new, improved user model called the New Relic One user model. This newer model offers a simpler, more efficient way to manage users and their access to roles and accounts.
At first, this new model was available mainly to new customers, while users in pre-existing New Relic organizations remained on our original user model. But now some original-user-model organizations that meet some requirements can use a migration wizard to migrate their users to the new model. When that migration process is complete, your users are on the New Relic One user model and you’ll have new procedures for managing your users and their access to accounts.
Benefits
When you migrate your users to this model, benefits include:
- Viewing and managing all users from multiple accounts in one place.
- Fewer steps to add and manage users.
- Flexible authentication options.
- More granular roles for user management.
- For Pro and Enterprise customers: access to automated user management via identity providers.
Learn more about the benefits of our new user model.
Requirements
Requirements include:
- You and your users must be on the original user model. If you aren't sure which you are, see Determine user model.
- To use the user migration wizard, you must have the Owner role and be a full platform user.
Determine if you should migrate users
We have some recommendations below that apply to organizations who choose to do the user migration on their own. These considerations won't apply if you're being helped by a New Relic representative; in that case, your account representative will give you guidance.
We recommend not using the user migration wizard in these circumstances:
- If your organization has more than 30 accounts (unless you're getting help from a New Relic representative). Note that this refers to having 30 or more accounts, not users.
- If you think any of the new user model impacts and limitations might affect you negatively.
- If you require account-level roles for user management capabilities. Roles related to user management (ability to add and update users, change user type, create access grants) currently apply across an entire organization and can't be assigned to specific accounts.
If you have questions about whether you should use the user migration wizard, talk to your New Relic account representative.
Optional: review your users' user type
For organizations on the New Relic One pricing model, your users' user type is a billing factor.
Whether you're currently on the New Relic One pricing model, or plan to soon switch to that pricing model, it may make sense to edit your users' user type before doing the user migration. One reason for that is that the original Users and roles UI allows you to see the time of your users' last use of New Relic (the new UI does not yet have this), and that can be useful for determining which user type to make them. For tips on how to do this, see Edit user type.
Optional: Understand user management concepts
The more you need to control your users' access to specific accounts or specific roles, the more it will help you to understand some basics about the new user management concepts. Here's a brief summary:
- Users are in a container called an "authentication domain". The domain governs how users are added to New Relic (manually with the UI or automatically via SCIM). It also governs how users log in (manually with email/password or using SAML SSO). Most organizations will have just one or two authentication domains: one for the default manual settings and another for the more automatic methods.
- Users can be assigned to one or more groups (for example, our default Admin group or a custom group like Contractors). For large organizations, users are often assigned to multiple groups.
- When you want to give a user group access to a specific role and a specific account, you must create an access grant. For example, you may give a Contractors group access to our default All product admin role on one or more of your accounts, or give that group a custom role.
To learn more:
- Review the user management concepts.
- Plan out your groups and access grants with this example planning spreadsheet.
Step 1: Start the user migration process and create admins
Before you start, be sure you've read the requirements and the other recommendations above. To start using the wizard:
- From one.newrelic.com, click Apps in the top navigation.
- In the table of apps, click the User migration walkthrough app.
- Optional: If you want more help and context, see the sections below for tips and recommendations for specific migration wizard pages.
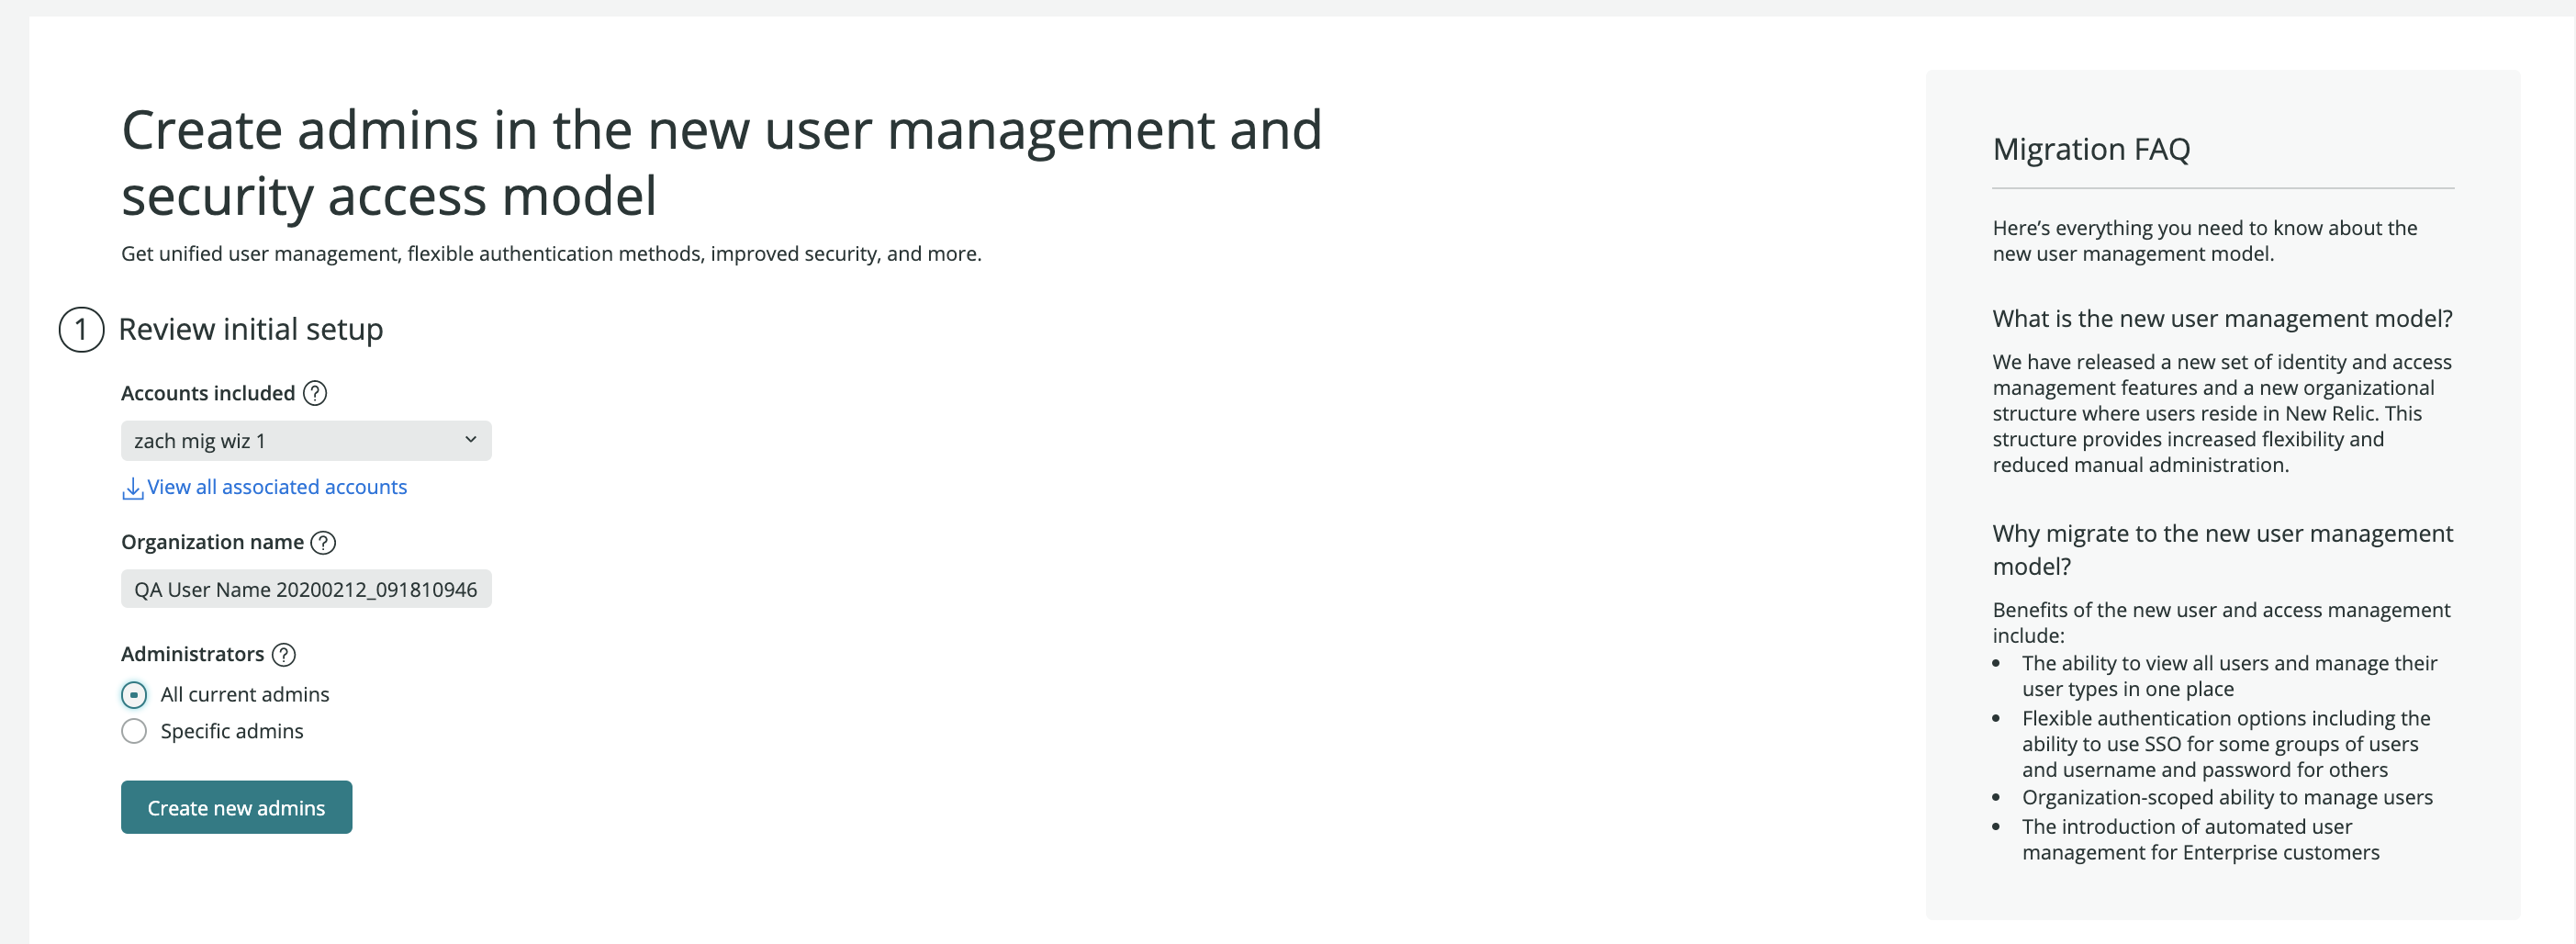
Here are some tips about using the first page:
- Check the Accounts included dropdown. Note that the user migration will only apply to the account selected. This means if your organization has multiple accounts, you should do the migration process for each of them.
- You can either a) import all current admins for your account or b) specify the admins that should have access to user management capabilities. Note that you can add more admin users and edit permissions after you complete the migration process.
- If you've already used the wizard to set up an admin on the new user model, have the admin sign in using their new user record to access the migration tool. The user migration wizard, when completed, destroys the old user record, but if you've started the user migration process without completing it, you may have users with access to both the original and new record, as shown below:

If a user on the new model has been created and the migration process hasn't been completed, they may have access to both the original user record and the new user records. - If you plan on migrating only a portion of your users to the new user model to start, we recommend leaving some original user model admins so that you have an admin to manage your original user model users.
Step 2: Set up organization

You may choose a) a guided setup that allows more configuration options, or b) an automatic setup with fewer steps. Some tips on choosing this:
- If you're not using SAML SSO or SCIM for the users you're migrating, and are okay giving all of your migrated users access to all accounts, we recommend using the automatic setup option. (Note that you can always do more partitioning of user access to accounts later.)
- Regarding SCIM provisioning: If you're planning in the near future to manage your New Relic users via SCIM provisioning, you should consider waiting to migrate them so that you can migrate them with SCIM enabled. This is because once users are migrated, they reside in a specific authentication domain and the domain can't toggle between SCIM and non-SCIM (Manual) once users are added to that domain.
Step 3: Name your organization
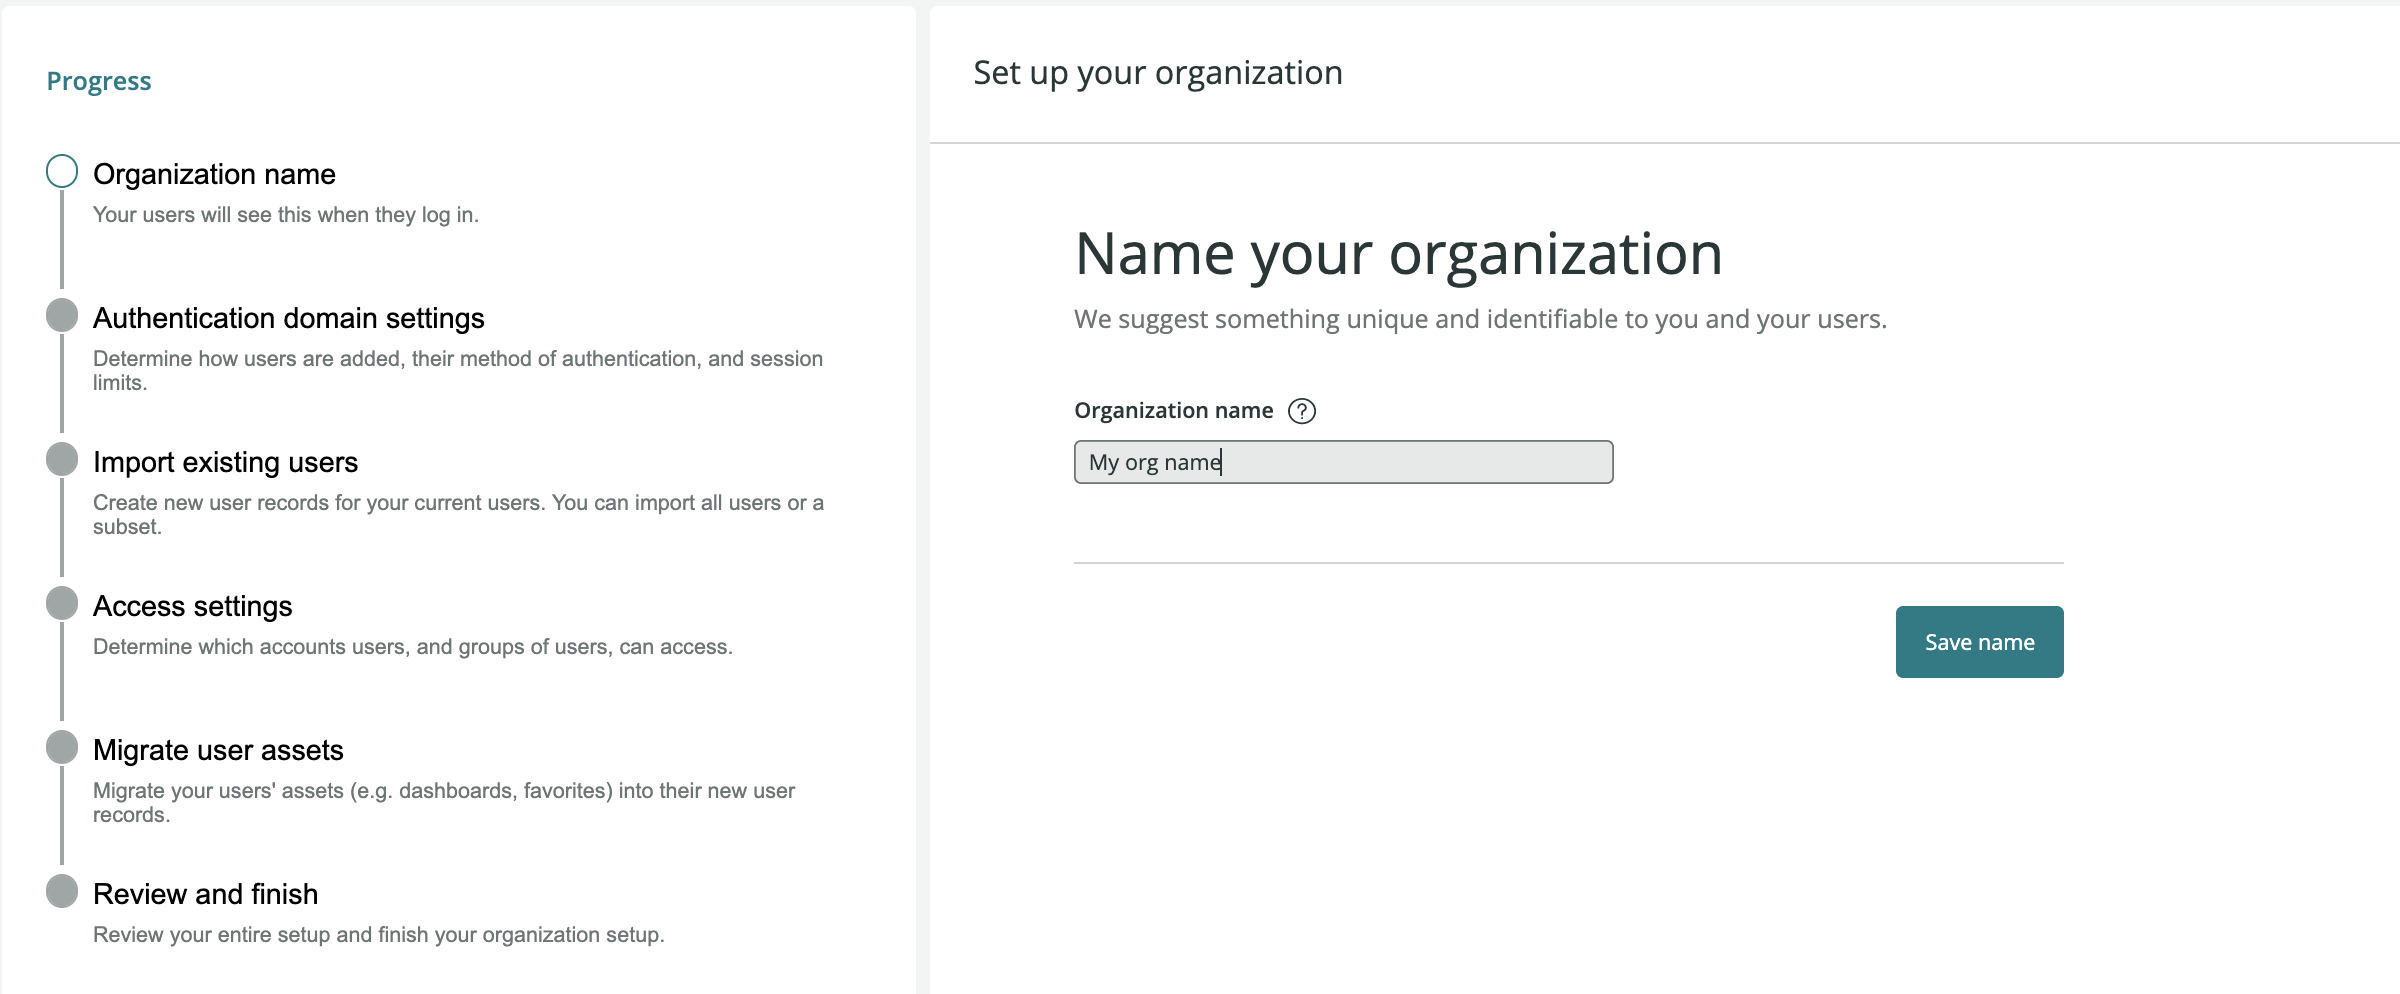
Name your organization something descriptive and easily recognizable.
Step 4: Authentication domain settings
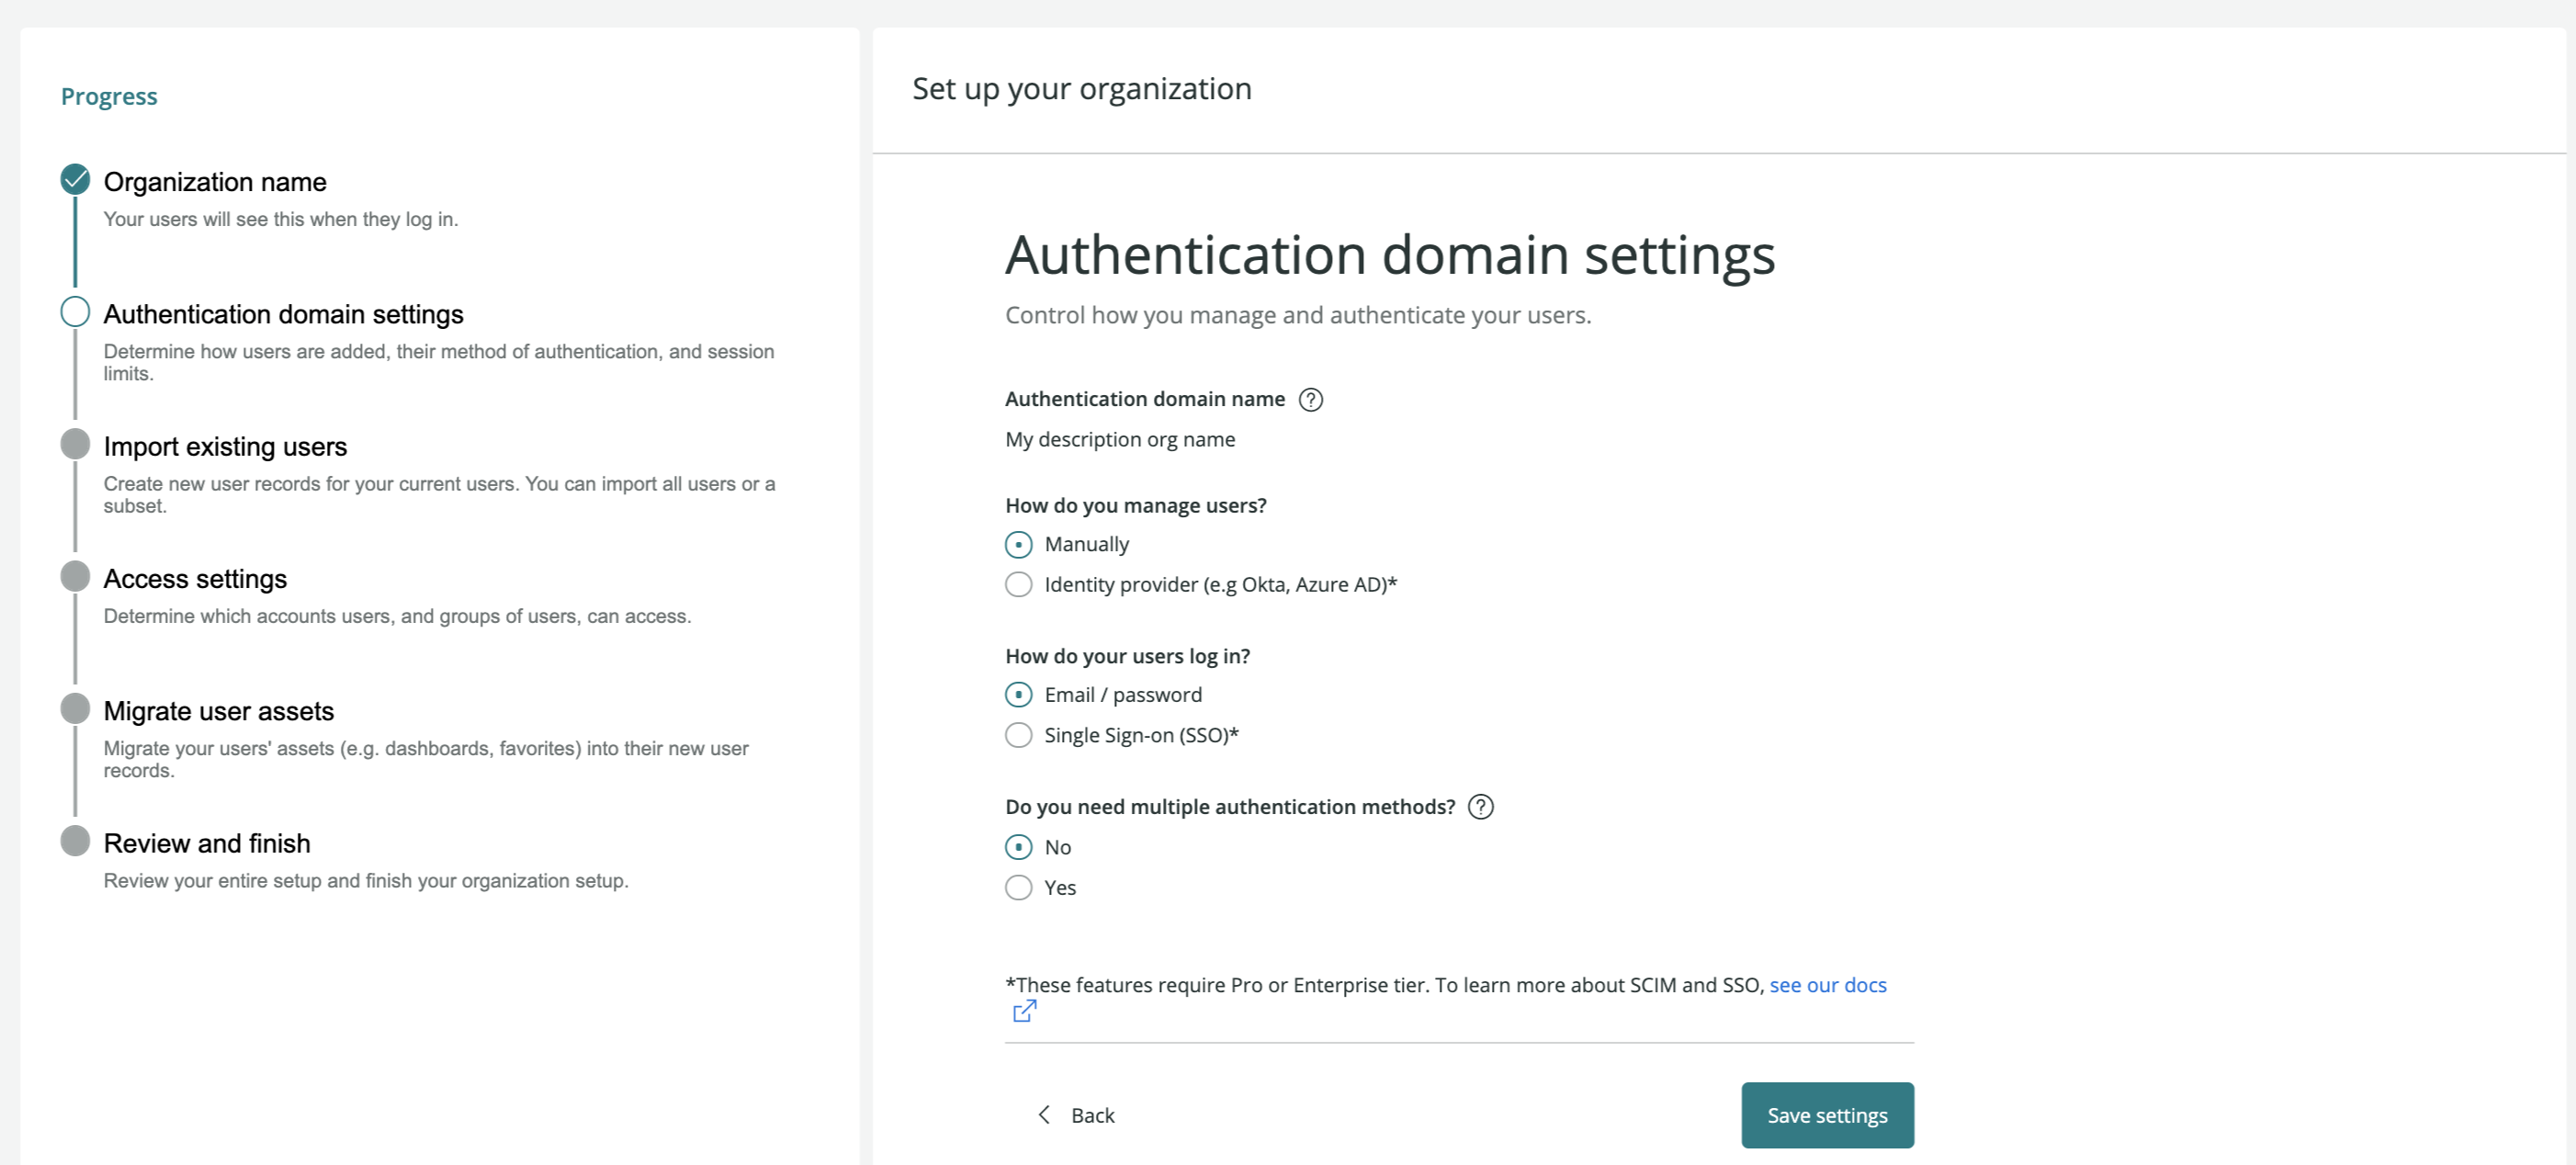
This section controls how users are provisioned (added to New Relic) and how they authenticate (log in). Note that choosing SAML SSO or SCIM setup will require you to exit the migration wizard and configure things elsewhere in the New Relic UI and in your identity provider and then return to the wizard.
Here's more detail about the two authentication domain sections:
Managing users (manual vs. identity provider)
For how users are added and managed, you can select Manually or Identity provider (SCIM). The option to use your identity provider to provision users via SCIM is available only if your organization has Pro or Enterprise edition.
If you choose Identity provider, you must follow the steps for automated user management. Once you complete those steps return to the user migration wizard and docs. Once you complete this step, we highly recommend completing the user migration process as quickly as you can. If you don't complete the later steps of migrating assets and deleting the original user record, your users may have two user records associated with the same login (see login screenshot from Step 1) or else may be missing assets they expect to see (like dashboards).
Some tips for syncing your identity provider with New Relic and setting up access grants:
- If you're already using a New Relic app for either Okta, Azure, or OneLogin, you're likely using an out-of-date version. The out-of-date app is titled "New Relic by account" while the newer, required app is titled "New Relic by organization."
- Once you complete those steps, new user records are created on the new user model and synced in New Relic based on your identity provider configuration. After you complete provisioning users, confirm that you see those user records in the new User management UI. Later, at step #6, you'll migrate your existing users' assets (dashboards, favorites, etc.) to the newly created user records.
- To access the new New Relic user management UI, you must be logged in via your new user record: this may require logging out, logging back in, and verifying your email to see all the logins associated with your email.
- When your identity provider is synced with New Relic and your users and groups are in New Relic, you must set up access grants. For some basics of how access grants work, see Access grants. For a tutorial, see the user management tutorial.
- Note that you won't be able to edit users or groups in New Relic: all user and group changes must be done from your identity provider.
Login methods (manual vs. SSO)
The login method gives you a choice for how those users log in. You can select either a) email/password login or b) single sign on (SSO). Note that SSO is available only for organizations with Pro or Enterprise edition.
If you're using SSO but not SCIM, you must complete additional steps to set up SSO. (If you've already followed the SCIM procedures in the previous step, you should have already set up SAML SSO.)
Some tips for setting up SAML SSO:
- If you're already using a New Relic app for either Okta, Azure, or OneLogin, you're likely using an out-of-date version. The out-of-date app is titled "New Relic by account" while the newer, required app is titled "New Relic by organization."
- To access the new New Relic user management UI, you'll have to ensure you're logged in via your new user record. This may require logging out, logging back in, and verifying your email to see all logins associated with that email.
- You can complete the procedure for setting up SSO, and then come back to the migration wizard to continue the migration process.
- If you select more than one authentication method, note that you’ll need to add a new authentication domain.
Step 5: Import existing users
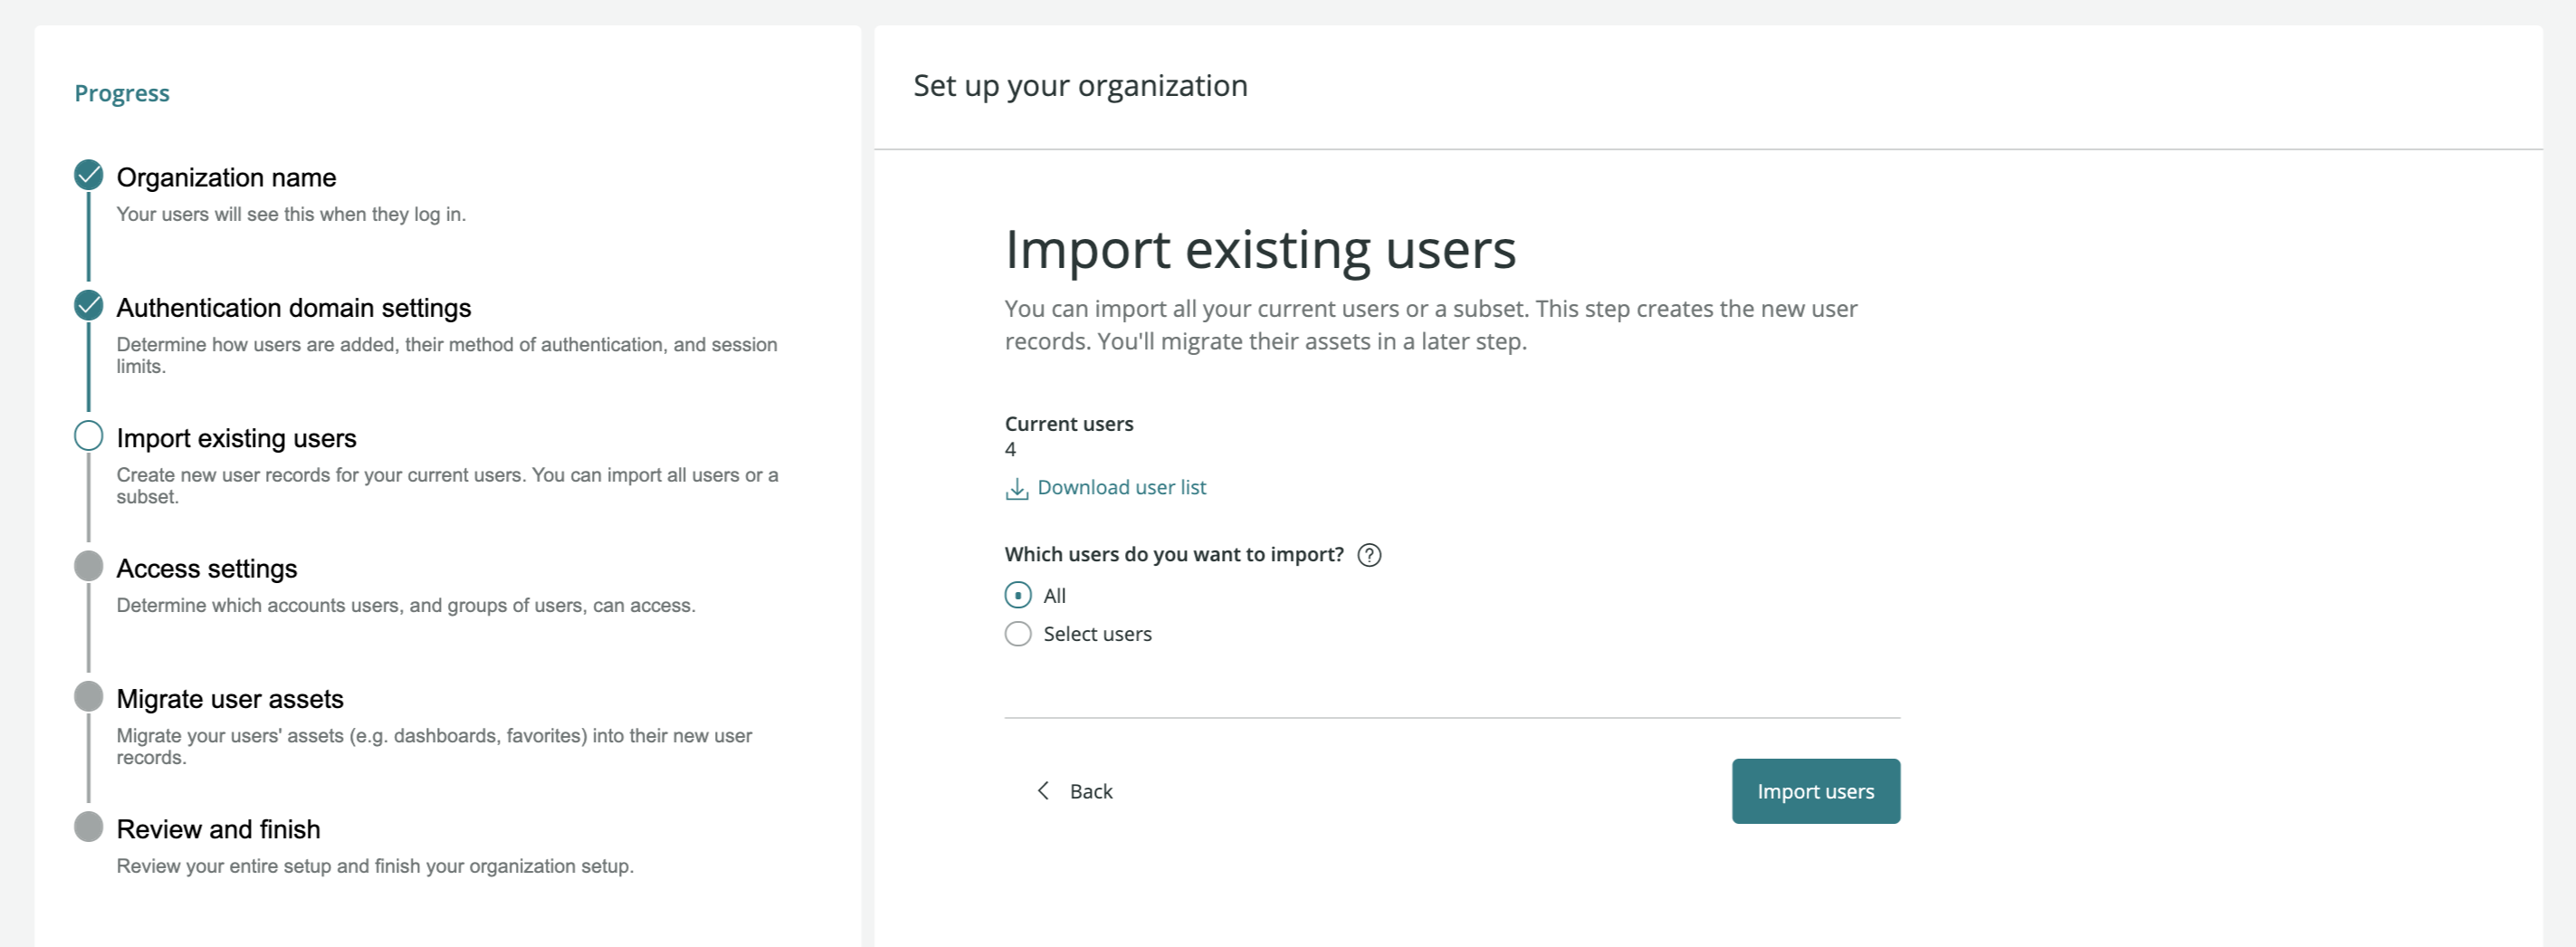
There are two methods for adding and managing your New Relic users. Select the method you'll be using for instructions and tips:
Step 6: Access settings
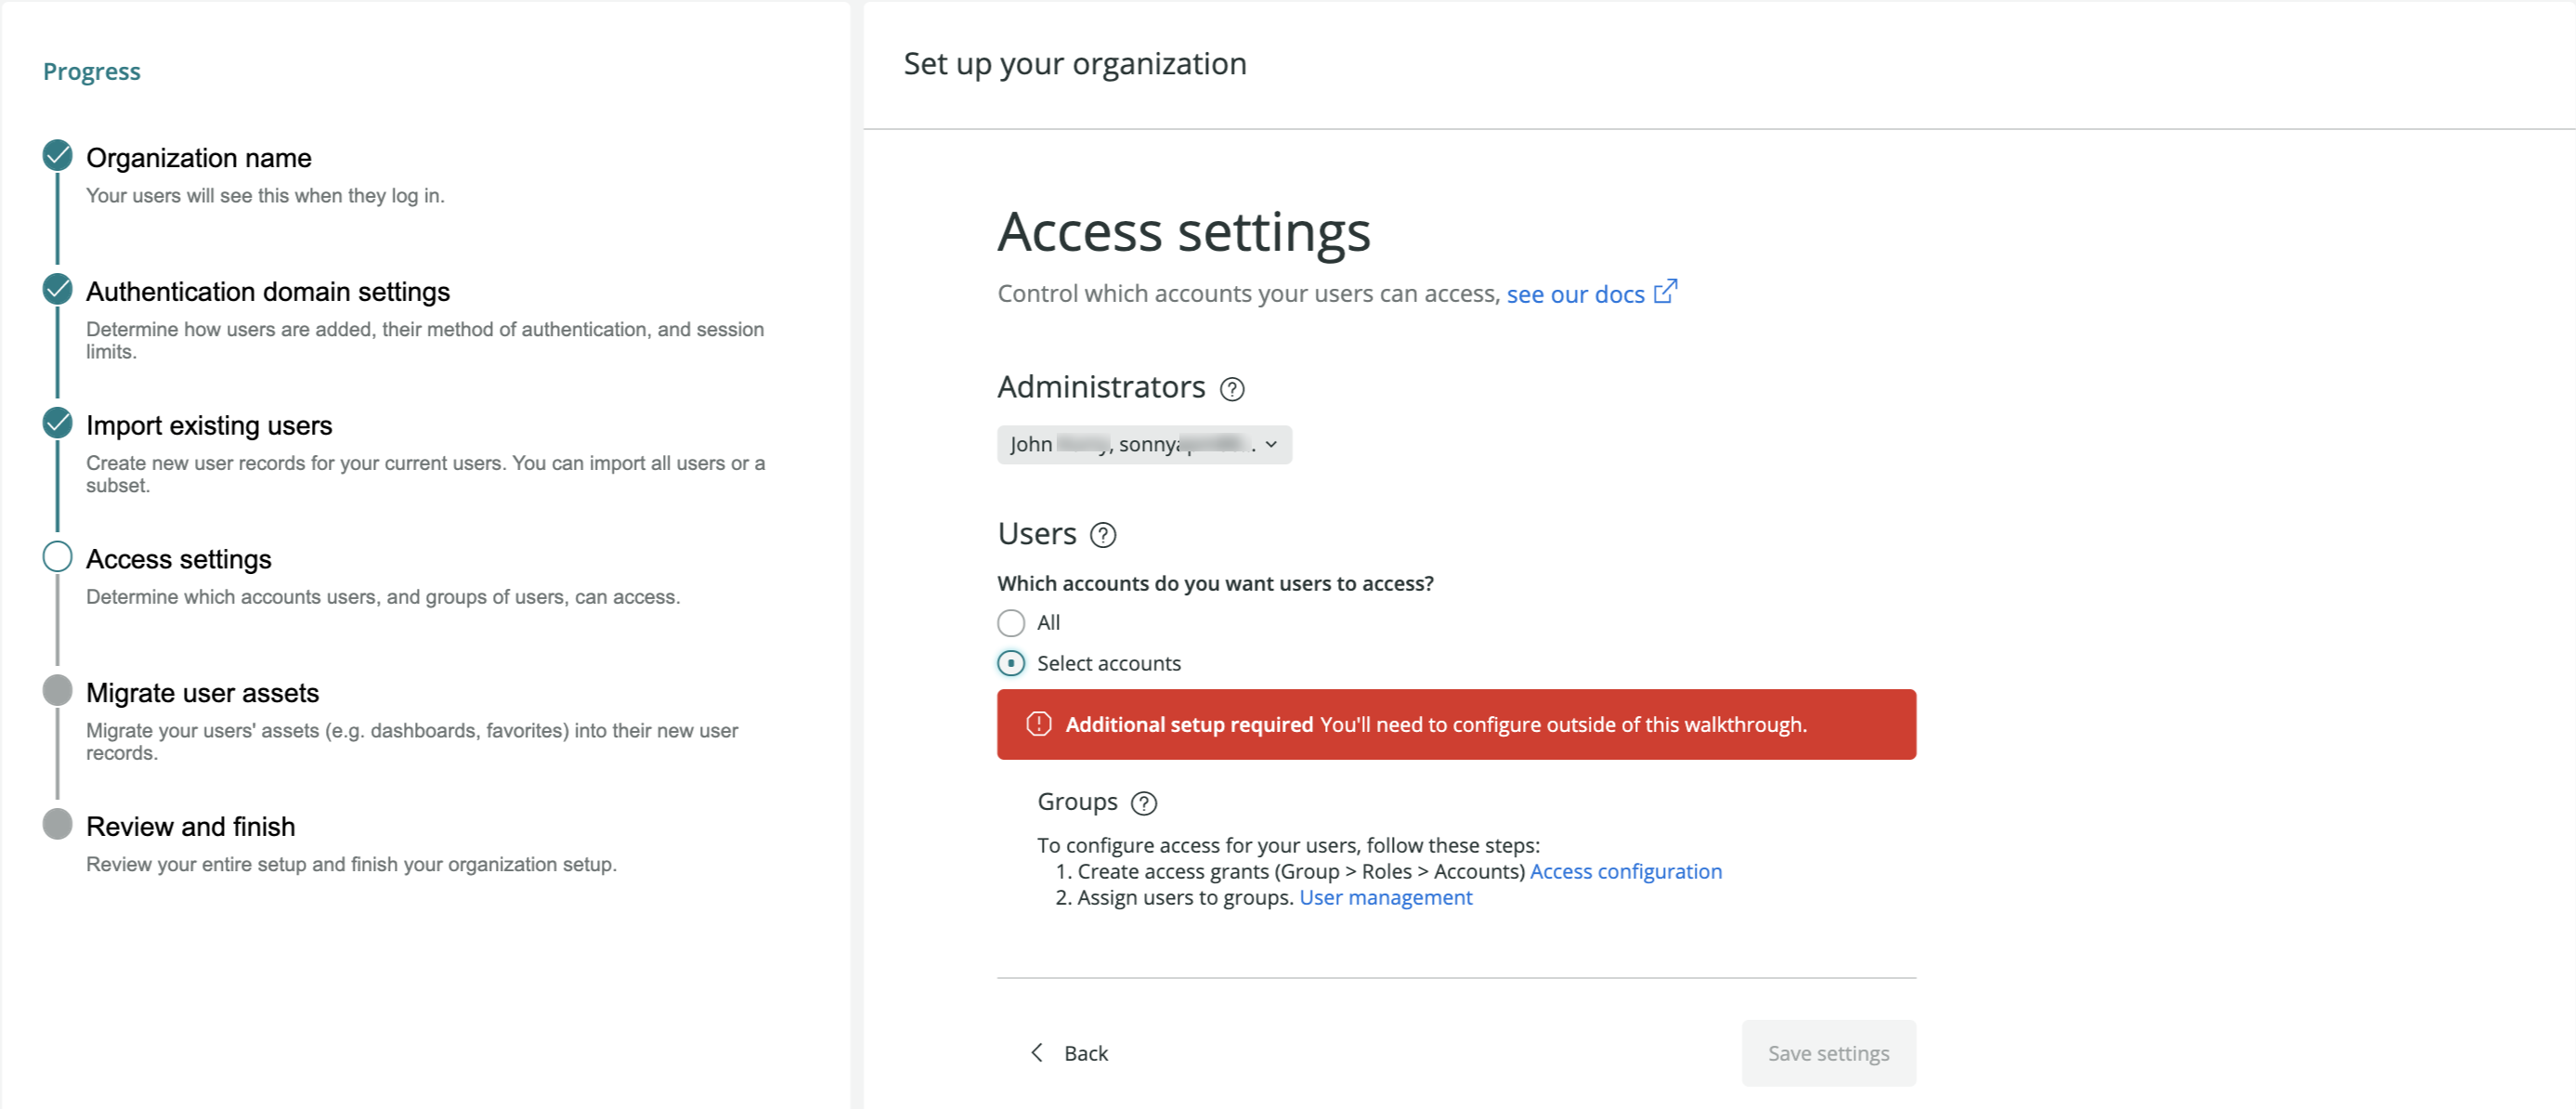
This step is about setting what roles and what accounts your user groups have access to. If you need to map user access to specific accounts and roles, then you'll want to set up groups and access grants at this stage. (If you've previously set up access grants as part of your SCIM setup in step #4, you can skip this step.)
You'll need to create an access grant for each account and role that you want a group to have access to. Resources to help you understand access grants:
- For basics of how access grants work, see Access grants.
- For a tutorial on how to create access grants, see the user management tutorial.
- For help planning out your access grants, see the Groups and access grant planning spreadsheet.
Step 7: Migrate user assets
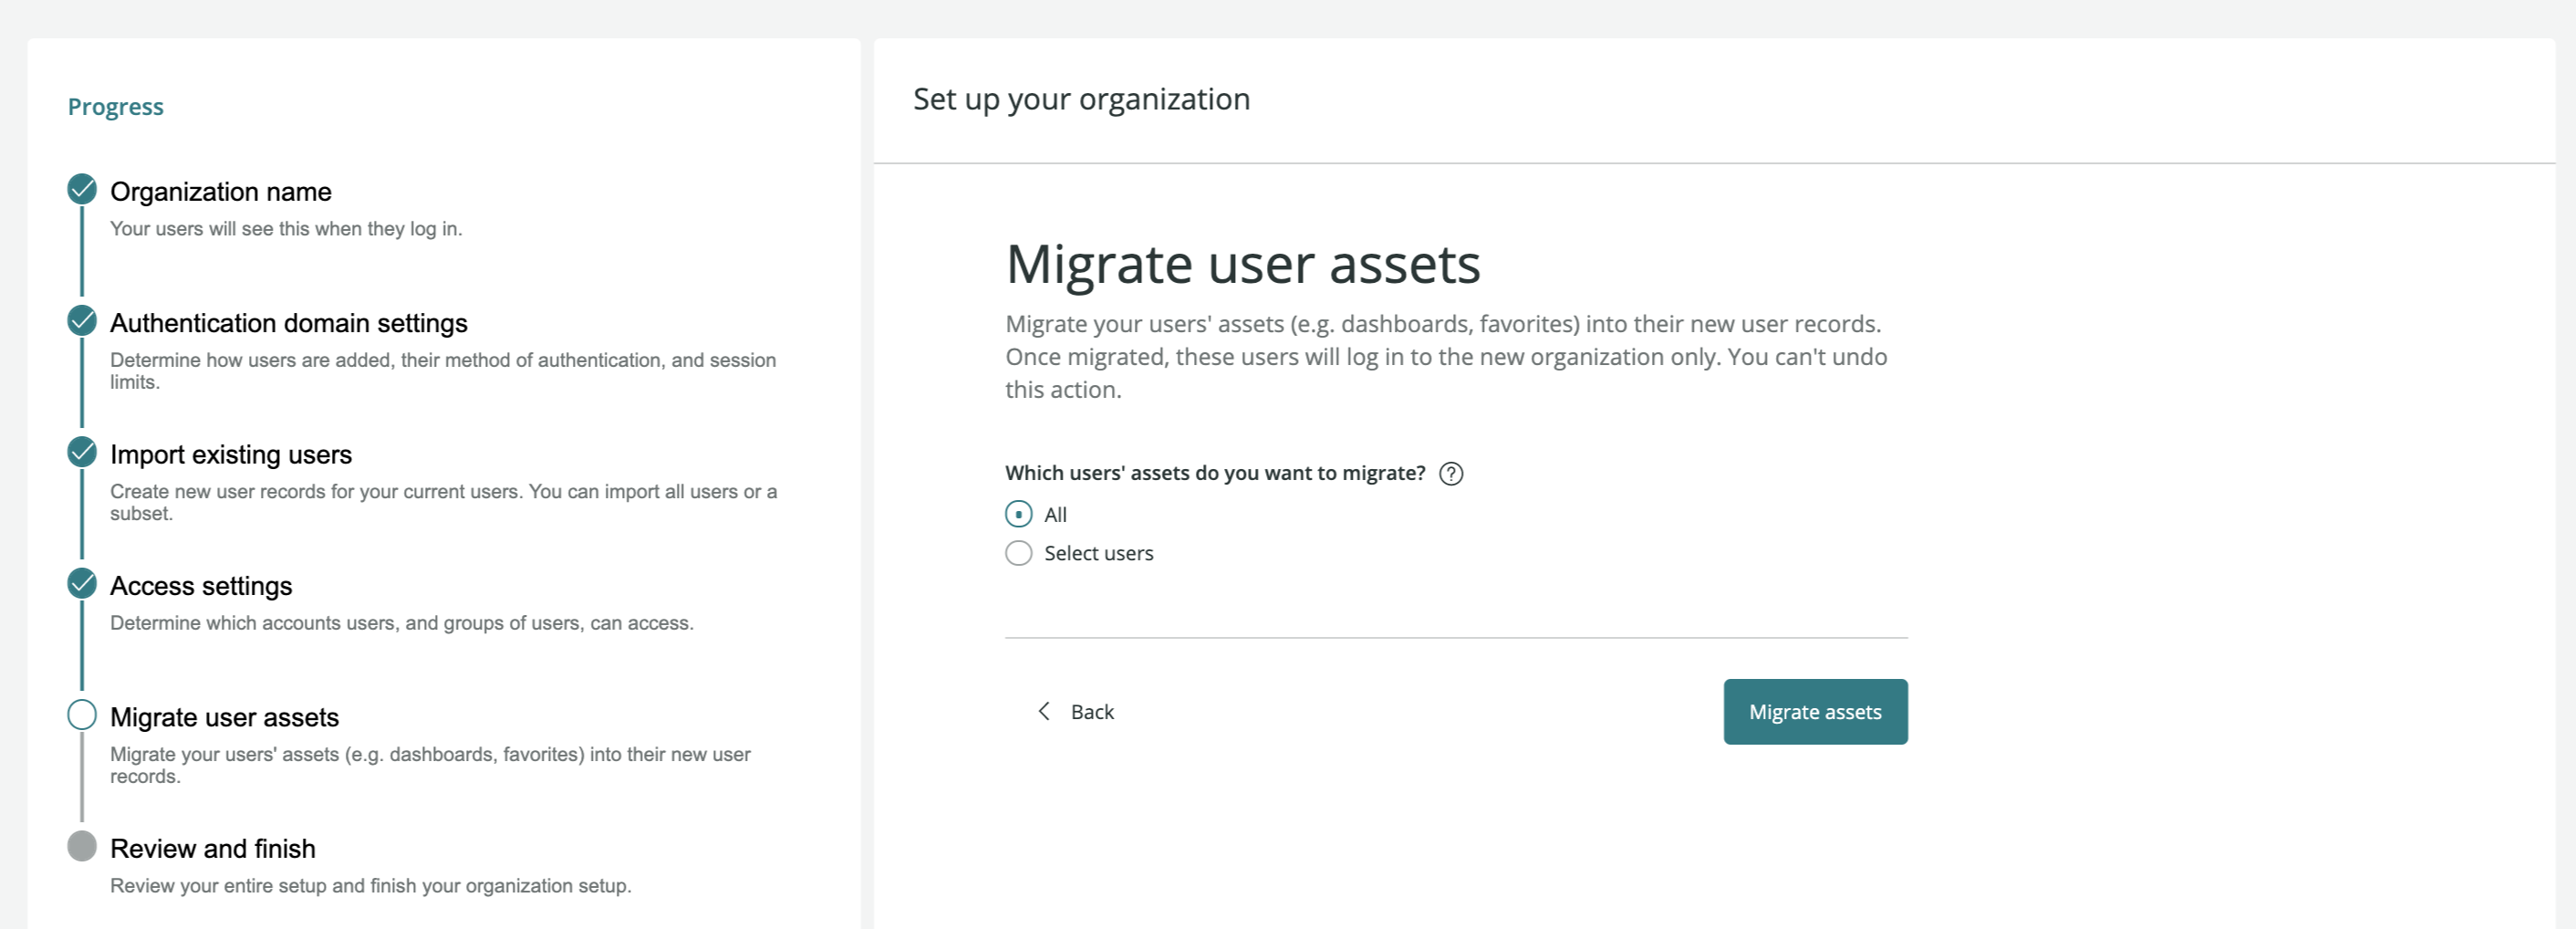
When this step is completed, the personal assets of your users are migrated to the new user records and the original user records are deleted. For users currently logged in to New Relic, once you complete this step, their current New Relic session won't be interrupted until they log out or until their current browser session expires.
User assets that are migrated include:
- Dashboards
- Favorites
- Weekly email settings
- Email opt in/out preferences
- User-specific user keys
- New Relic One apps NerdStorage data
If a user has access to several organizations that use New Relic (for example, if that user is a contractor), their original user model record won't be fully deleted until all those organizations migrate their users. Such a user will have both an original user record and one or more new user records, and if that's the case, that is displayed upon login (see the login screenshot in Page 1 section).
Step 8: Review and finish
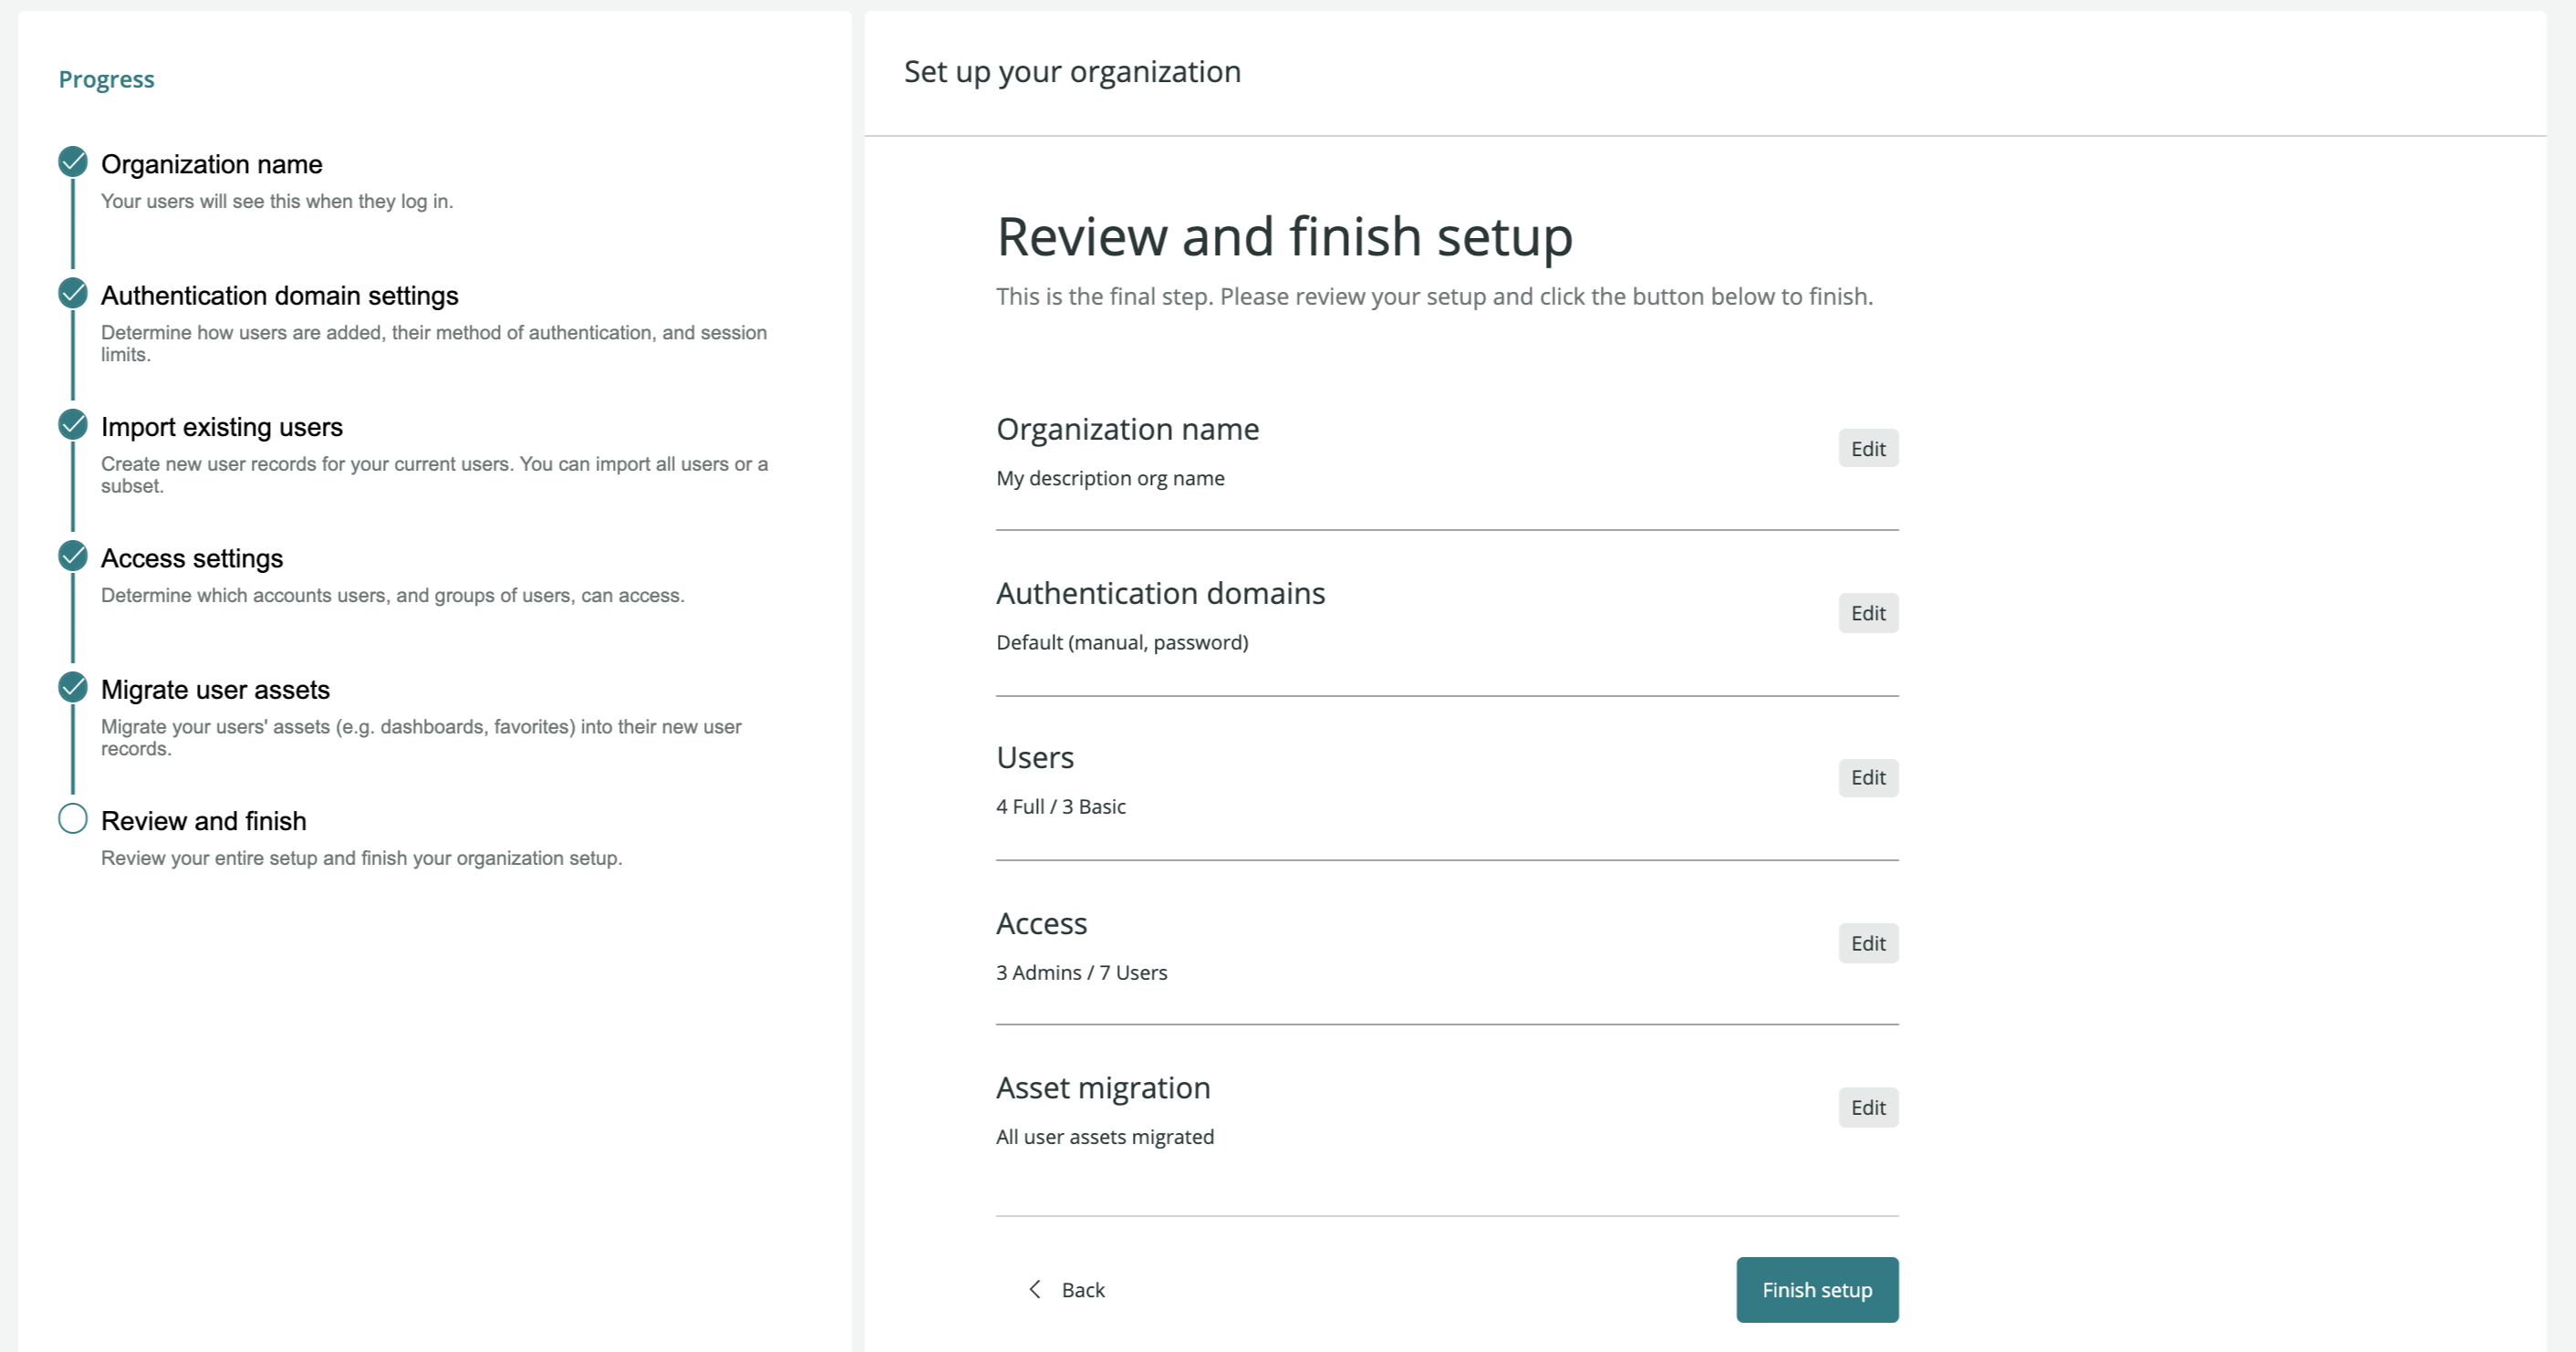
If you're migrating users in segments and not all at once, you can go through the migration workflow several times with different groups of users. You can only click Finish Setup when all users in the organization are migrated.
Troubleshooting
Some common problems after migration:
- If you have admin-level roles assigned but get an error message when trying to access New Relic platform features, it may be because you've been assigned organization-scoped roles (Organization manager and/or Authentication domain manager) but not any account-scoped roles. To access New Relic features in a specific account, you'll need at least one account-scoped role (for example, All product admin or a custom role).
- If you've completed the migration, or are partway through the migration, and still see the original user management UI (the UI accessed through the Account settings tab), this may be because you are still logged in to your original user model record. Some remedies for this:
- Log out of New Relic and log back in, selecting the Verify email option. When you've verified your email, choose the login option that says "Organization" and not the one that says "Original New Relic account."
- If you're still having problems, clear your browser cache and attempt logging in again.
After you're done
Once your users are migrated to the new user model, you can find and manage them by clicking the account dropdown, clicking Administration, and using these UI pages:
- User management: use this to view and add users, change their type (basic versus full), change their group, and approve user upgrade requests.
- Organization and access: use this to create access grants (granting groups access to roles and accounts), and configure authentication domains (SAML SSO settings and SCIM settings, and more).
For some tips for planning out access grants, see Tips on access grants.
For more about these tools and concepts, see the user management docs.